Muskoka North Good Food Co-op
0

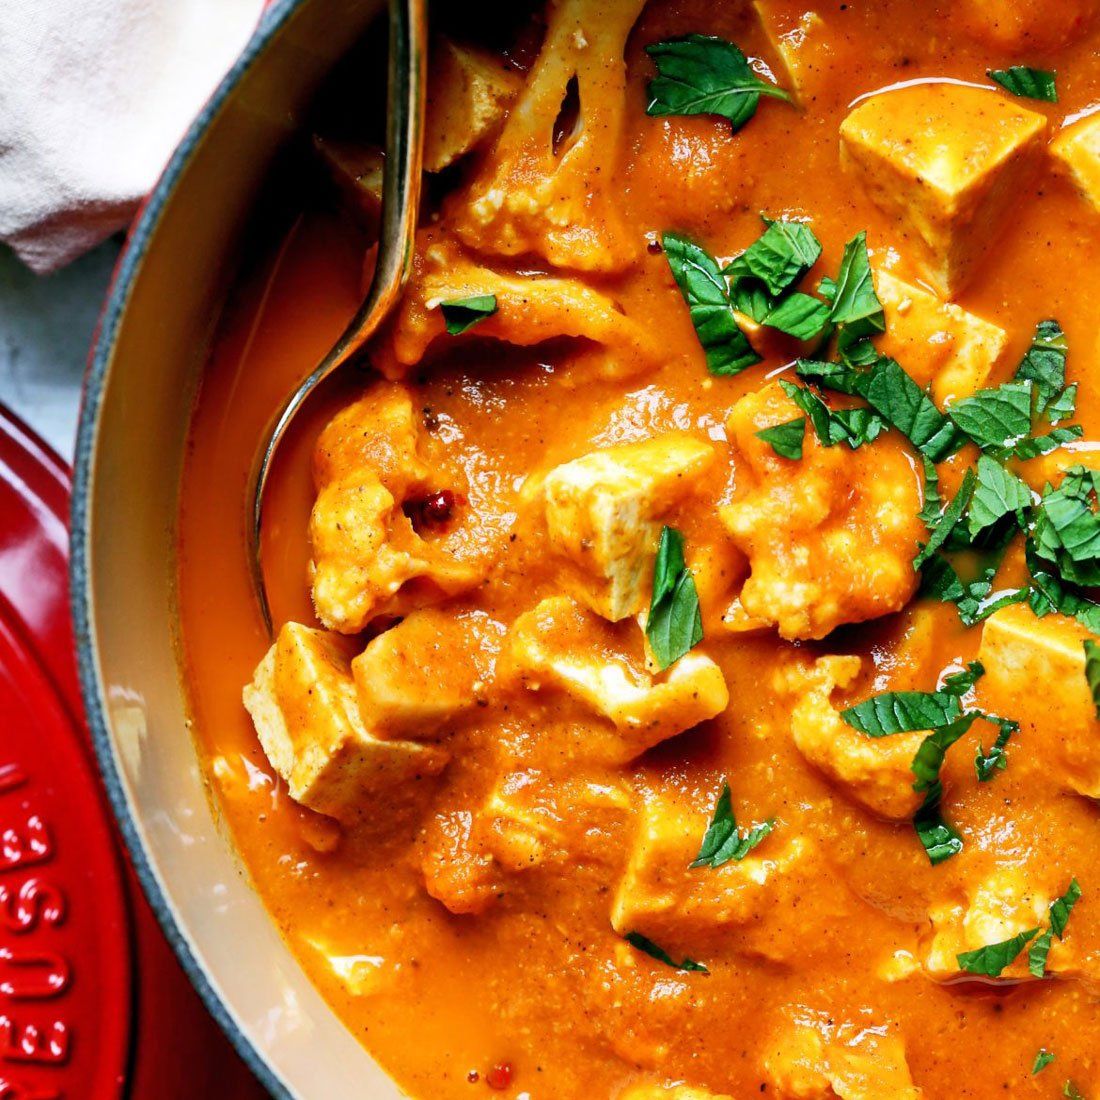
Vegan West African Sweet Potato & Organic Peanut Stew

Nov 05, 2021

Hover over the below images for step by step instructions.

This West African-inspired peanut soup recipe is a creamy and comforting, spicy vegan soup. Made with a simple combination of organic peanut butter, tomato, coconut milk, veggies and hardy greens, this stew comes together quickly and makes a great weeknight meal. If you love spicy flavours, don’t hesitate to use liberal amounts of ginger, garlic & hot sauce!


Ingredients

  • 3 cups low-sodium vegetable broth
  • 1 cup water
  • 1 tablespoon olive or sunflower oil (if oil free, use water)
  • 1 medium red onion, chopped
  • 1 heaping tablespoon peeled and minced(or grated) fresh ginger
  • 4 cloves garlic, minced
  • 1 small jalapeño (or approx. 1 heaping tsp optional)
  • 1 large sweet potato or yam
  • 1 large carrot
  • 1 tomato
  • ½ cup cooked chickpeas (garbanzo beans)
  • 3-4 big stalks collard greens/kale, ribs removed and leaves chopped
  • into 1-inch ribbons
  • 3/4 cup unsalted organic peanut butter (chunky or smooth)
  • 1/2 cup tomato paste
  • ½ cup coconut milk
  • 1 teaspoon salt (to taste optional)
  • cilantro, for garnish (approx. 2-4 tablespoons optional)
  • ¼ cup roughly chopped peanuts, for garnish
  • hot sauce of your choosing (optional)
  • 1 cup raw millet, for serving with stew


Instructions

1. Peel and chop sweet potato into dice-sized pieces. Peel then slice the carrot into ¼” rounds. Chop red onion and tomato. Remove greens from tough ribs of kale/collard and ribbon chop. Peel and mince garlic and ginger root. Set aside.


2. Place a medium-sized stew pot over medium heat and add 1 tbsp oil. When hot, add the onion, ginger, garlic and salt. Sautee for 4~5 mins.


3. Add yam, carrot and chickpeas (carefully) into the pot, stir and cook for 2 mins. Then add 3 cups of stock and 1 cup of water, bring to boil. Simmer on medium heat, with lid on slightly (allow steam to escape) for 20 minutes.


4. While the simmering is going on, cook your millet (see end of recipe) and prepare flavour paste.


5. Flavour paste: In a medium-sized, heat-safe mixing bowl combine the peanut butter, tomato paste and coconut milk, then transfer 1 cup of the hot stock to the bowl. Carefully whisk the mixture together until smooth, then pour (use a rubber spatula) the flavour paste back into the soup and mix well.


6. Stir in the ribboned collard greens/kale and chopped tomato. Add chopped jalapeño if using. Jalapeño is quite a mild pepper. (If you like even more heat, at the end add your favorite hot sauce to your individual bowl).


7. Chop your peanuts and cilantro, including stems. Finely chopped raw jalapeño also offers a very nice flavour.


8. Simmer for 10 minutes more on medium-low heat with the lid off, stirring often. Season with additional salt if you like. Serve with cooked millet (see cooking instructions below) or any grain, and garnish with a sprinkle of chopped peanuts and chopped cilantro (use the stems)


MILLET: Millets are a really cool food. They are a group of highly variable small-seeded grasses and remain a staple in the diets of about a third of the world’s population. They are important crops of Asia and Africa due to their productivity in short growing seasons and high-temperature conditions. Millets are indigenous in many parts of the world; the most widely grown is pearl millet. Millets are high in iron, B Vitamins, magnesium, manganese, phosphorus, and zinc and are naturally gluten-free and highly alkaline which makes them easily digestible. Millets have a lovely, light texture when cooked, are relatively quick cooking because of their small size, and are incredibly versatile in dishes ranging from breakfast to dinner.


Cooking Millet

  • 1 c. raw millet
  • 2-1/4 c. water (or broth)
  • ¼ tsp. sea salt


Directions to Cook Millet

  1. Place the millet in a sieve and rinse well with cool water. After that, toast the millet for a deep, roastier flavor to the finished dish (you can skip that step, but toasting it makes it better).
  2. Toasting: Place the rinsed millet in a dry, wide bottomed saucepan and heat over medium heat for about 4 minutes, stirring or shaking back and forth constantly until the millet turns golden brown and starts to smell fragrant.
  3. Add the water, and sea salt into the same saucepan.
  4. Give the mixture a good stir and turn the heat up to high. Bring the mixture to a boil, then lower the heat until the liquid is at a simmer and cover the pot.
  5. Cook for about 15 minutes until most of the liquid has been absorbed, keeping the pot covered until you start checking towards the end of the cooking time.
  6. Remove the pot from the heat and let it sit, with the cover still on, for 10 more minutes.
  7. Remove the cover and fluff the millet with a fork, much like you would fluff rice. Taste and add more salt if needed. Serve hot with your stew!
Share this with friends, sharing is caring!

Other cool things we are doing...

13 Jun, 2022
This quick and Easy vegan Biryani is a fragrant Indian rice dish infused with toasted spices – it’s vegan adaptable and gluten-free! Serve with Cilantro-Mint Chutney, this meal will add a great, new item to your vegan recipe repertoire! Ingredients 2 cups brown basmati rice 2 tablespoons olive oil (or coconut oil) 1 med-large onion, thinly sliced 1/2 red bell pepper, thinly sliced 2 medium sized carrots, dice sized pieces ½ cup yam, peeled and chopped into dice sized pieces ¼ large cauliflower, chopped into plum sized pieces 3 garlic cloves, rough chopped 2 tsp fresh ginger, grated or use ginger paste 1 tsp cumin ( or whole seeds) 1 tsp coriander (or whole seeds, cracked open) 1 teaspoon chili powder 1 baby finger length cinnamon stick (or one cinnamon stick) 3 crushed cardamom pods (crushed to open) 1/4 teaspoon ground turmeric 1 bay leaf 1 star anise pod (optional) 4 cups veggie stock ¾ tsp sea salt, more to taste ½ cup cooked chickpeas, drained & rinsed ⅛ cup organic raisins Garnish: Fresh herbs~chopped parsley, cilantro, & chives (you can use fresh basil too!) Instructions 1. Rinse your rice in hot water until it runs clear. Keep it soaking in a bowl of hot water while you prep your ingredients. 2. In a large skillet or pot, heat oil over medium-high heat. Add the onion and sauté, stirring often, until tender and golden, 5 minutes. Turn heat to medium, add the veggies, garlic and ginger, and sauté 4-5 minutes. **Remove one cup of the veggie mixture; set aside** 3. Add spices (reserve a pinch for the Naan), and bay leaf, and stir for one minute, toasting the spices. Drain the rice and add it along with veggie stock and salt. 4. Top with chickpeas, raisins and the cup of veggies you set aside. Bring to a simmer over high heat, then lower heat to low. Cover the pot with a thin, clean dish towel, then place the lid over the top of the towel, and bring the four corners of the towel up and over the lid. This will tighten the seal and keep the steam in, allowing the rice to cook more quickly and evenly. 5. Simmer on low for 25-35 minutes or until the rice has soaked up the liquid. 6. Near the end of cooking time, fire up your oven to 300 degrees, lightly brush your Naan with olive oil, sprinkle with sea salt and a pinch of spice blend. Place on baking tray to warm for 3 minutes or to preference. Turn off your oven! 7. While it is simmering make the Cilantro Mint Chutney (you don’t have to do this step today!) 8. Uncover the Biryani and fluff up with a fork. Plate and then drizzle with Cilantro-mint Chutney and top with the fresh, chopped herbs. 9. Serve with warm Naan and enjoy! Variations: You can get really creative (or just use what’s in the fridge)by adding any other veggies to the Biryani. Ingredients for Cilantro-Mint Chutney ½ cup vegan coconut yogurt (unsweetened) 3 tablespoons fresh lemon juice 1 bunch cilantro, leaves & clean stems 1 cup mint leaves, packed 1 medium jalapeno, sliced 2 teaspoons fresh ginger 3 garlic cloves ½ tsp. Sea salt 10 raisins (soaked in water then drained) 1-2 tbsp. Water to add to blender if chutney needs thinning Instructions for Cilantro-Mint Chutney 1.Blend all ingredients in a blender or food processor until relatively smooth. 2. Taste and adjust salt and lemon to your liking. 3. Refrigerate until serving. 4. Chutney will keep for 6 days in the fridge.
27 May, 2022
A healthy & delicious vegan meal (or side dish) you will fall in love with! Za’atar is a spice mixture that includes the various herbs along with toasted sesame seeds, dried sumac, sea salt and other spices. It is extremely popular throughout the Middle East and the Mediterranean. Get your cauliflower into the oven, then put the quinoa on the stove. While those are cooking, prepare your sauce and dressing Ingredients 1 whole cauliflower 2 tablespoons olive oil, divided ½ teaspoon salt 1 tablespoon za’atar spice 1 cup water 1 batch Aji Verde~tahini sauce (see recipe) Garnish with fresh herbs – parsley, dill and or mint, sprinkle with chili flakes, drizzle with this optional Aji-Verde Tahini sauce! Instructions 1. Preheat the oven to 425F. Trim the cauliflower – either cutting off the stem (easier) or leaving it intact, trimming and slicing the bottom so it stands up straight. 2. Place it in a baking dish. Drizzle 1 tbsp. oil all over the cauliflower, sprinkle with salt and Zaatar spice. Pour one cup of water into the bottom of the pan. 3. Cover tightly with the lid, foil or even better, a piece of parchment paper, and bake for 40-55 minutes- or until tender all the way to the middle, when pierced with a knife. Smaller cauliflower heads may only take 30 minutes, larger can take up to 60. Ingredients for Aji Verde Tahini Drizzle ½ cup water 2 tablespoons lemon juice 3 tablespoons olive oil 2 fat garlic cloves 3/4 cup fresh herbs (cilantro, Italian parsley, mint, dill or basil or a combo!) 2–3 slices jalapeno (optional) ½ - 1 teaspoon salt, start with 1/2 teaspoon add more to taste ½ cup tahini paste, stirred Instructions for Aji Verde Tahini Drizzle 1.Place all the ingredients (except the tahini paste) in a blender or food processor and blend until combined but not overly smooth. Add tahini paste. Blend until creamy, leaving some of the herbs intact. Taste, and adjust salt, acid and heat. (You can add salt, lemon, or fresh chilies to taste). If you want a thinner sauce, add a little more water until the desired consistency. Quinoa, Arugula & “feta” Salad w/lemon-garlic vinaigrette The BEST quinoa and arugula salad recipe is bright, fresh, + flavorful. The perfect side to a grilled dinner or easy lunch. Ready in just 20 minutes. You’ll find yourself making this cold quinoa arugula salad over and over again! Not only is this quinoa and arugula salad incredibly flavorful with its bright lemon vinaigrette, but each serving of this vegan quinoa salad has a whopping 19 grams of plant based protein making it a great make-ahead lunch or dinner side. Store this leftover healthy quinoa salad in the refrigerator for 1-2 days. For best results, store all of the components separately so that the arugula doesn’t get soggy. When you’re ready to serve, take the dressing out of the fridge to come to room temperature (if you forget, run the jar under warm water) and assemble salad, dress, and toss together. Sprinkle with roasted almonds. It works well as a prep-ahead salad. Ingredients For the Salad 1 cup raw quinoa (you’ll need 2 cups of cooking water) 4 cups arugula, washed (you can use literally any green leafy veggie) ½ cup any cooked and rinsed beans (black beans, chickpeas, navy beans…) ½ cup fresh chopped herbs (parsley, cilantro, mint, basil, oregano, chives) 2 tbsp. vegan cheese (feta style is best) 2 tbsp. almonds, roasted and chopped (or any toasted nut/seed) lemon vinaigrette (triple or quadruple this recipe for a great dressing that will store for 2 weeks): 2 tbsp. lemon juice- about 1 lemon (cut lemon in half and use a spoon to “reem” the juice out into a bowl. Use a spoon to pull seeds out of bowl, the pulp is great to leave. 1 tbsp. lemon zest (zest that lemon) 3 tbsp. olive oil 1 tbsp. maple syrup 2 cloves garlic, minced 3 tbsp. shallots minced (about one) 1/2 tsp. sea salt 1/4 tsp. black pepper Instructions For Salad Prepare quinoa: 1 part uncooked quinoa (e.g. 1 cup quinoa—any color. You will end up with three times as much cooked quinoa) 2 parts water (e.g. 2 cups water). Salt, to taste (around ¼ teaspoon salt per cup of dry quinoa). 1. Rinse the quinoa: Pour the quinoa into a fine mesh colander and rinse under running water for at least 30 seconds. Drain well. This step removes any bitterness on the outside of the quinoa (caused by naturally occurring saponins). 2. Combine the rinsed quinoa and water in a saucepan. Bring the mixture to a boil over medium-high heat, then decrease the heat a bit to maintain a gentle simmer. Cook until the quinoa has absorbed all of the water, about 10 to 20 minutes (small amounts of quinoa will be ready closer to 10 minutes; larger amounts between 15 to 20). Reduce heat as time goes on to maintain a gentle simmer. 3. Remove the pot from heat, cover, and let the quinoa steam for 5 minutes. This step gives the quinoa time to pop open into little curlicues, so it’s nice and fluffy. Remove the lid and fluff the quinoa with a fork. Season with salt, to taste. Pour into a salad bowl to cool. 4 . In a small bowl, whisk together all vinaigrette ingredients. Season with salt and pepper to taste. 5 . Toss quinoa, arugula, fresh herbs, beans, “feta” and dressing together. Sprinkle with chopped almonds. ENJOY!! Za’atar Spice Blend Ingredients 2 tablespoons roasted sesame seeds 1/2 cup ground sumac 4 tablespoons dried thyme 4 tablespoons dried marjoram 4 tablespoons dried oregano 2 teaspoon coarse salt Roast the sesame seeds in a dry pan. Don’t walk away from them as it happens fast. Once golden and aromatic, pour into a mortar and pestle and give it a quick grind. If you don’t have a mortar, don’t worry, they can be added whole. Combine with all the other ingredients and store in an airtight jar for months.
13 May, 2022
Hover over the below images for step by step instructions.
28 Apr, 2022
Hover over the below images for step by step instructions.
18 Mar, 2022
Hover over the below images for step by step instructions.
04 Mar, 2022
Hover over the below images for step by step instructions.
18 Feb, 2022
Hover over the below images for step by step instructions.
02 Feb, 2022
Hover over the below images for step by step instructions.
03 Dec, 2021
Hover over the below images for step by step instructions.
18 Nov, 2021
Hover over the below images for step by step instructions.
More Posts
Share by: